At Partition Stalls, we know that installing bathroom stalls can be a daunting task. That’s why we’ve created this comprehensive guide on how to install bathroom stalls.
Our step-by-step instructions will walk you through the entire process, from preparation to final touches. Whether you’re a DIY enthusiast or a professional contractor, this guide will help you achieve a successful installation.
What You Need Before Installing Bathroom Stalls
Essential Tools and Materials
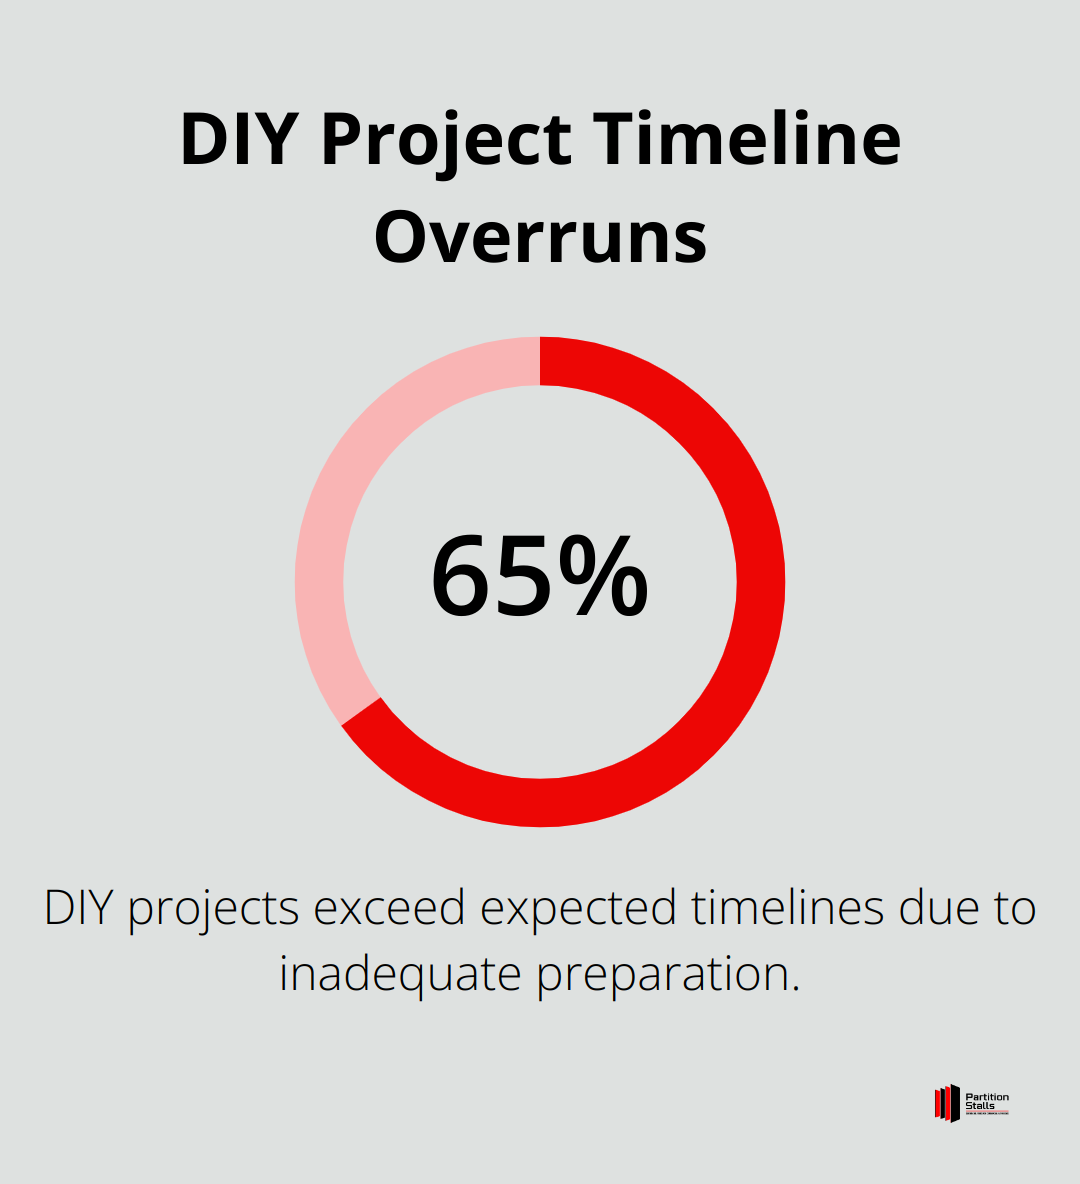
The installation of bathroom stalls requires careful preparation. You’ll need to gather specific tools and materials before you start. A drill, level, tape measure, pencil, and screwdriver are essential. Don’t forget safety equipment such as gloves and safety glasses. Ensure you have all partition components, including panels, doors, pilasters, and hardware. A survey by the National Association of Home Builders reveals that 65% of DIY projects exceed expected timelines due to inadequate preparation. Double-check your supplies to avoid delays.
The Importance of Precise Measurements
Accurate measurements are vital for a successful installation. Measure the bathroom space multiple times to prevent costly errors. Pay close attention to the placement of plumbing fixtures and potential obstructions. To enhance accuracy, consider using digital measurement tools (which can reduce errors by up to 50%).
Understanding Building Codes and ADA Requirements
Review local building codes and ADA requirements before you begin. Compartment doors must meet applicable requirements for doors, including the clear width (32″ minimum), hardware, and opening force (5 lbs. maximum). Familiarize yourself with these regulations to avoid potential legal issues and ensure accessibility for all users. Compliance with these standards is not just a legal requirement but also ensures that your bathroom stalls serve all users effectively.
Professional Consultation
While DIY installation can be rewarding, the complexity of bathroom stall installation often benefits from expert guidance. Consider consulting with a professional if you’re unsure about any aspect of the process. They can provide valuable insights into local regulations, optimal layout designs, and installation techniques that can save time and prevent costly mistakes.
With these preparations complete, you’re ready to move on to the actual installation process. The next section will guide you through the step-by-step procedure to install your bathroom stalls correctly and efficiently.
How to Install Bathroom Stalls: A Step-by-Step Guide

Marking the Layout
Start your installation process with a clear floor plan. Use a chalk line to mark the exact positions of pilasters and panels on the floor. This step ensures proper alignment and spacing. A well-marked layout can reduce installation errors by up to 15% (according to a survey of professional installers).
Pilaster and Bracket Installation
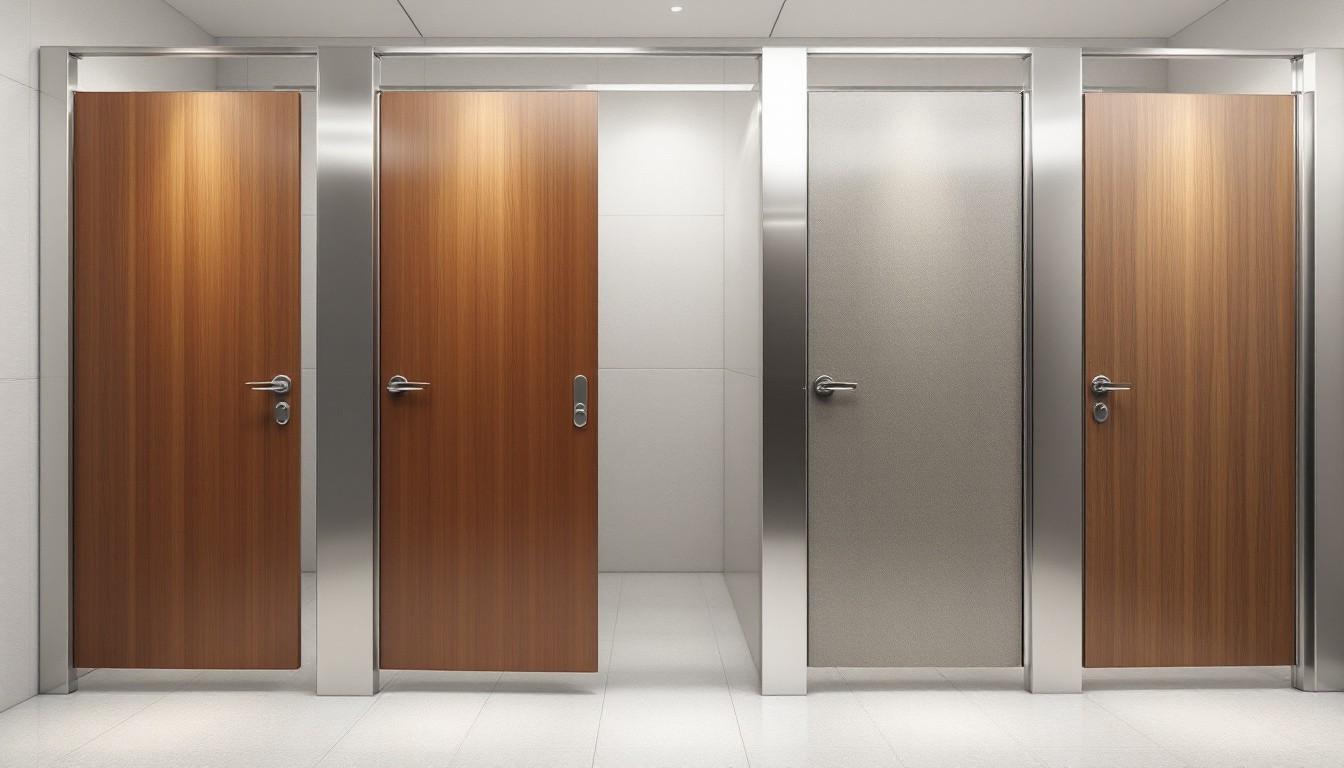
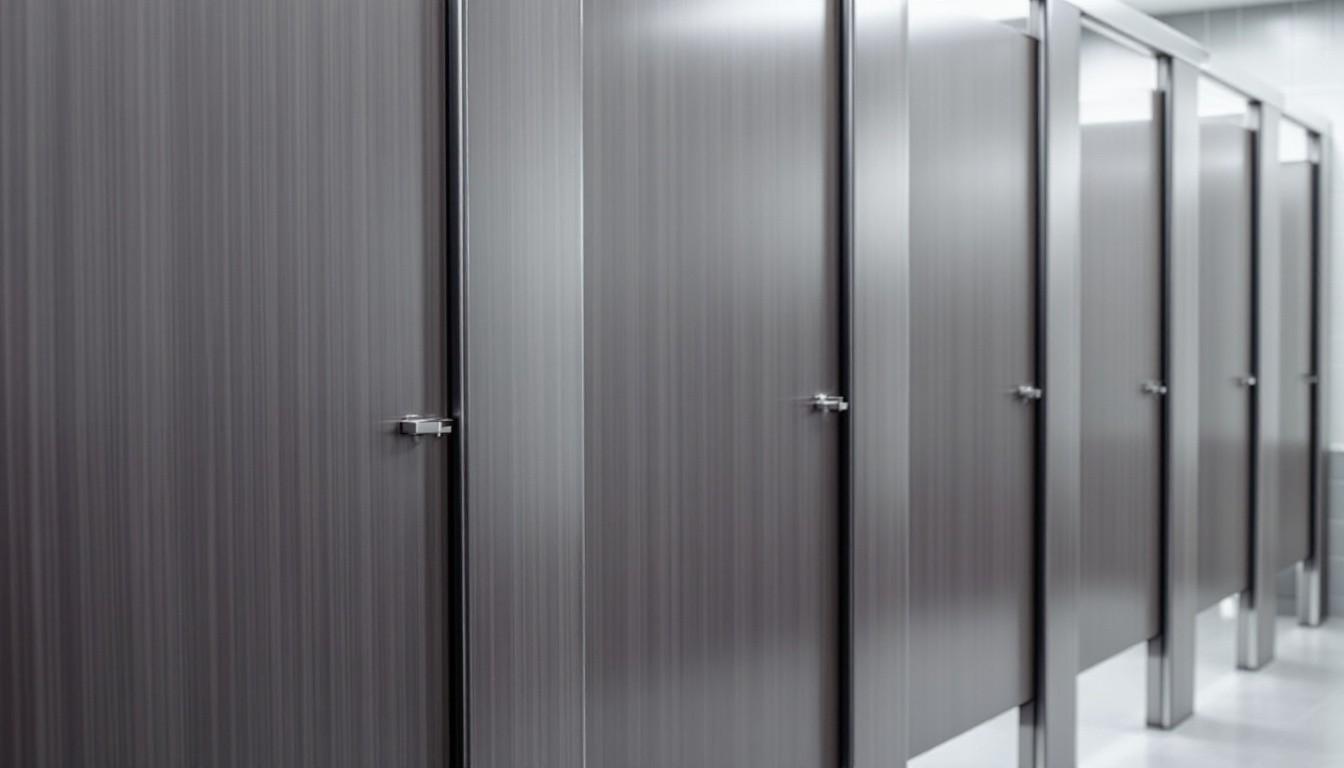
Install the pilasters first. These vertical supports form the backbone of your stalls. Drill pilot holes at the marked locations, then secure the pilasters with heavy-duty anchors. Choosing commercial toilet partitions is crucial for public restrooms, affecting privacy and hygiene.
Next, attach wall brackets. Ensure these brackets are level and plumb for optimal stability. Use a laser level for precision – it can cut installation time by up to 20% compared to traditional leveling methods.
Panel and Door Attachment
With pilasters in place, attach the panels. Slide each panel into the corresponding brackets and secure them with the provided hardware. Avoid overtightening, as this can damage the panels.
For doors, first attach the hinges to the pilaster. Then, hang the door and adjust it to ensure proper alignment and smooth operation. Maintain a gap of about 1/4 inch between the door and pilaster for optimal functionality.
Hardware and Accessories Installation
The final step involves adding hardware and accessories. This includes door latches, coat hooks, and toilet paper dispensers. Position these items according to ADA guidelines (e.g., accessories mounted above an obstruction must be located between 44″ and 48″).
Install the headrail last. This component provides additional stability to the entire structure. Secure it firmly to the top of each pilaster for maximum support.
Throughout the installation, check for level and plumb regularly. Small misalignments can lead to significant issues over time. Precise installation ensures longevity and user satisfaction.
Now that you’ve completed the installation process, you might encounter some common challenges. Let’s explore these issues and their solutions in the next section to help you troubleshoot effectively.
Overcoming Installation Hurdles
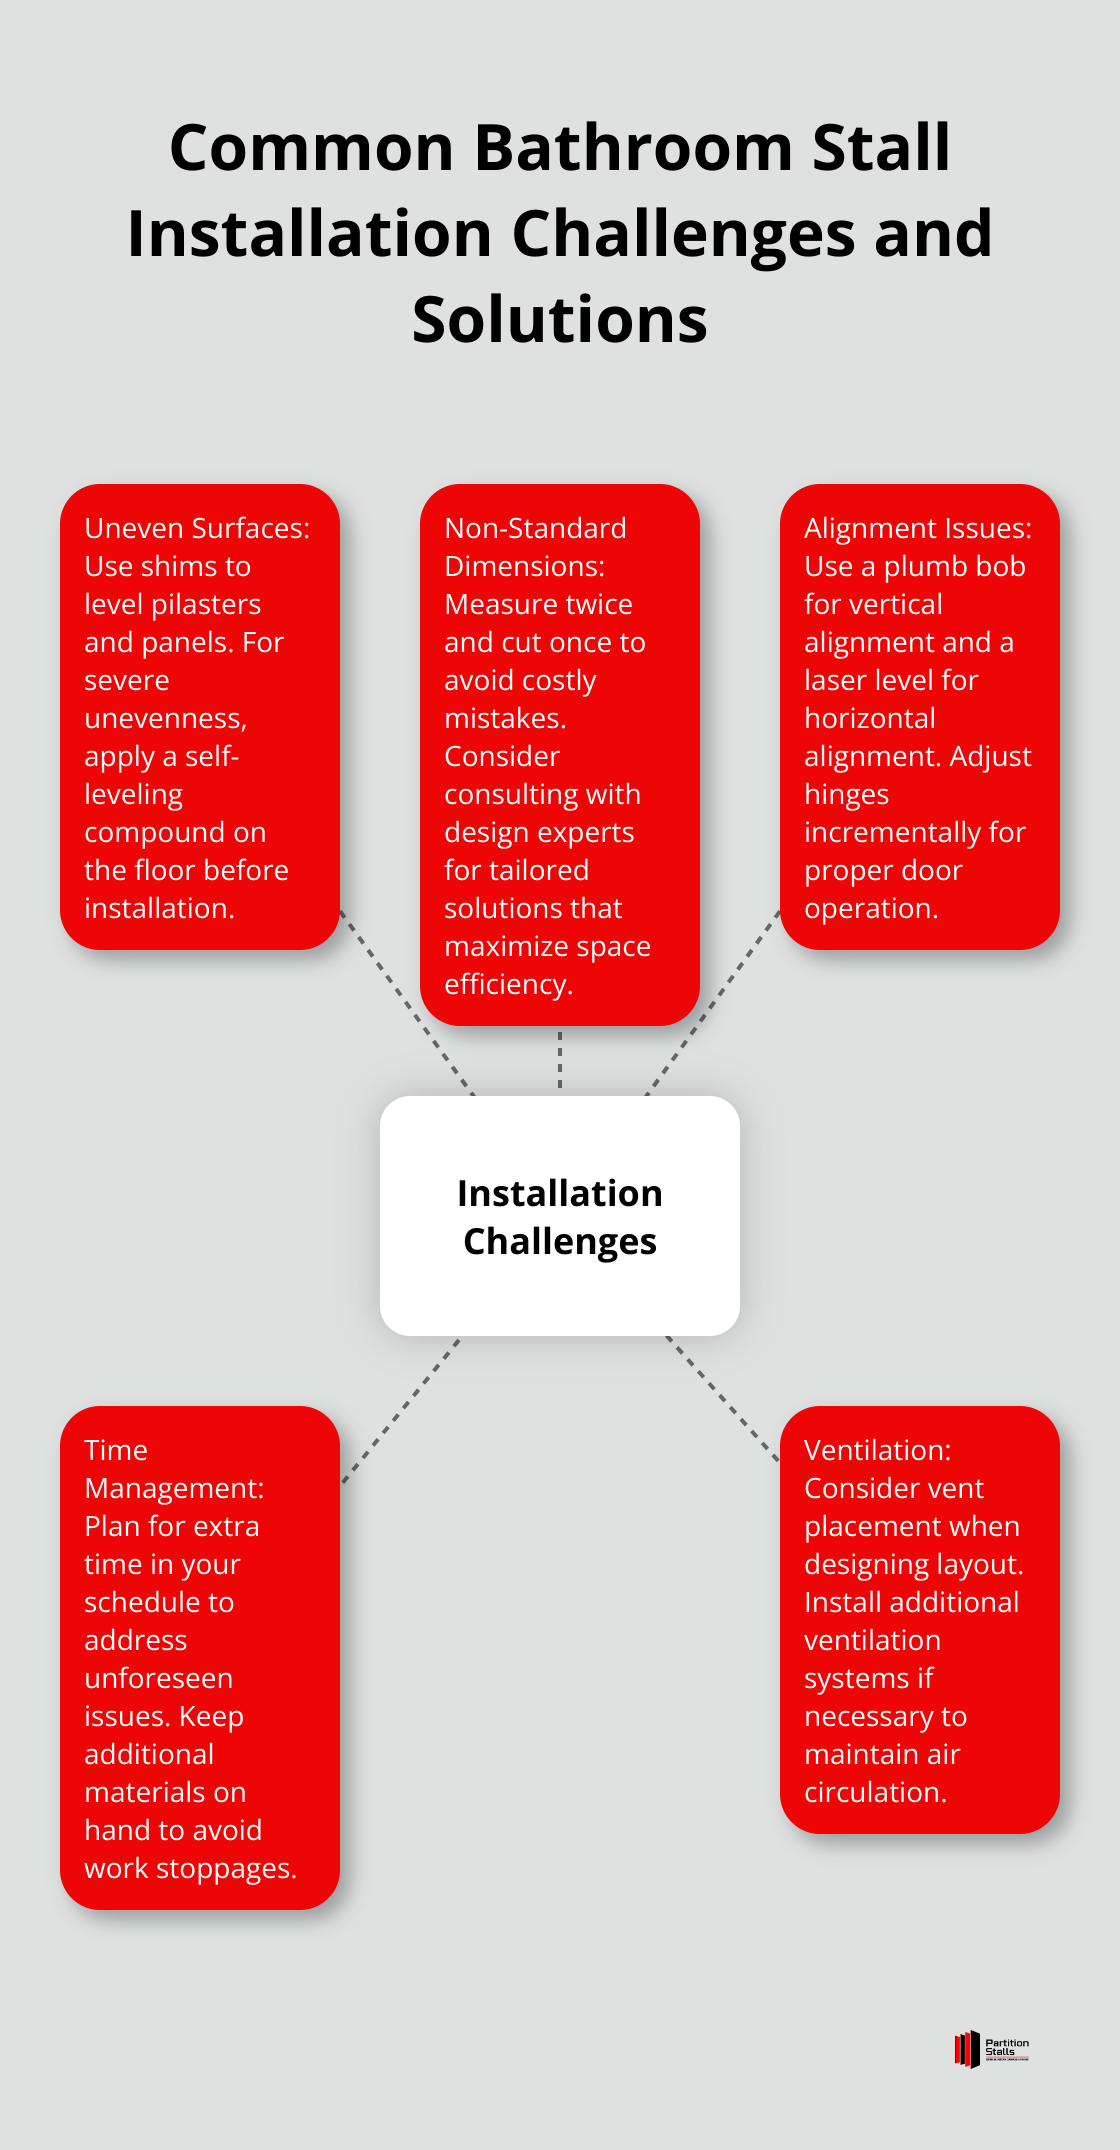
Tackling Uneven Surfaces
Uneven floors or walls present common obstacles in bathroom stall installation. Use shims to level pilasters and panels. Plastic shims offer durability and reliability, with a ribbed design that helps stabilize and level uneven toilets. For severe unevenness, apply a self-leveling compound on the floor before installation. This approach can reduce installation time and improve overall stability.
Adapting to Non-Standard Dimensions
Not all bathrooms conform to standard dimensions. Irregular spaces often require custom-cut panels. Measure twice and cut once to avoid costly mistakes. For challenging layouts, consider consulting with design experts who can create tailored solutions that maximize space efficiency while maintaining ADA compliance.
Resolving Alignment Issues
Misalignment leads to gaps, uneven doors, and compromised privacy. Use a plumb bob to ensure vertical alignment of pilasters. For horizontal alignment, a laser level significantly improves accuracy. If doors don’t close properly, adjust the hinges incrementally until you achieve smooth operation. A well-aligned installation can extend the lifespan of your partitions.
Managing Time and Resources
Installation challenges often result in unexpected delays. Plan for extra time in your schedule to address unforeseen issues. Keep additional materials on hand (e.g., extra screws, brackets) to avoid work stoppages due to missing components. Proper planning can reduce overall installation time.
Ensuring Proper Ventilation
Adequate ventilation prevents moisture buildup and extends the life of your bathroom stalls. Consider the placement of existing vents when designing your layout. If necessary, install additional ventilation systems to maintain air circulation. This step can reduce maintenance costs over the lifetime of the installation.
Final Thoughts
Installing bathroom stalls requires careful planning and precise execution. Each step plays a vital role in creating a functional, durable, and compliant restroom space. Proper installation ensures privacy and comfort for users while minimizing maintenance costs over time.
Professional installation services offer expertise, efficiency, and peace of mind. At Partition Stalls, we provide high-quality commercial restroom solutions and expert guidance to meet all necessary standards. Our goal is to create a clean, welcoming, and functional restroom environment that serves all users effectively.
The process of how to install bathroom stalls goes beyond following steps. It involves understanding local building codes, adhering to ADA requirements, and addressing unique challenges (such as uneven surfaces or non-standard dimensions). A successful installation reflects the quality and care you put into your facility, providing years of reliable service and user satisfaction.